
Workspaces
Arrange existing subshells in a workspace layout.
Before you start
Create the subshells you want to arrange. A workspace organizes references to those sessions; it does not create a separate copy of their processes.
Build a layout
- In the server dashboard's sidebar, choose Workspaces and select New workspace at the top of the page.
- Under Existing subshells, select the sessions you want to include and choose Create workspace.
- Click the workspace title at the top of its page to give it a recognizable name.
- Select Add subshell at the top of the workspace to include an existing session or launch a new one.
- On a wide screen, drag a session's pane tab toward an edge of another pane and release it when the split preview appears.
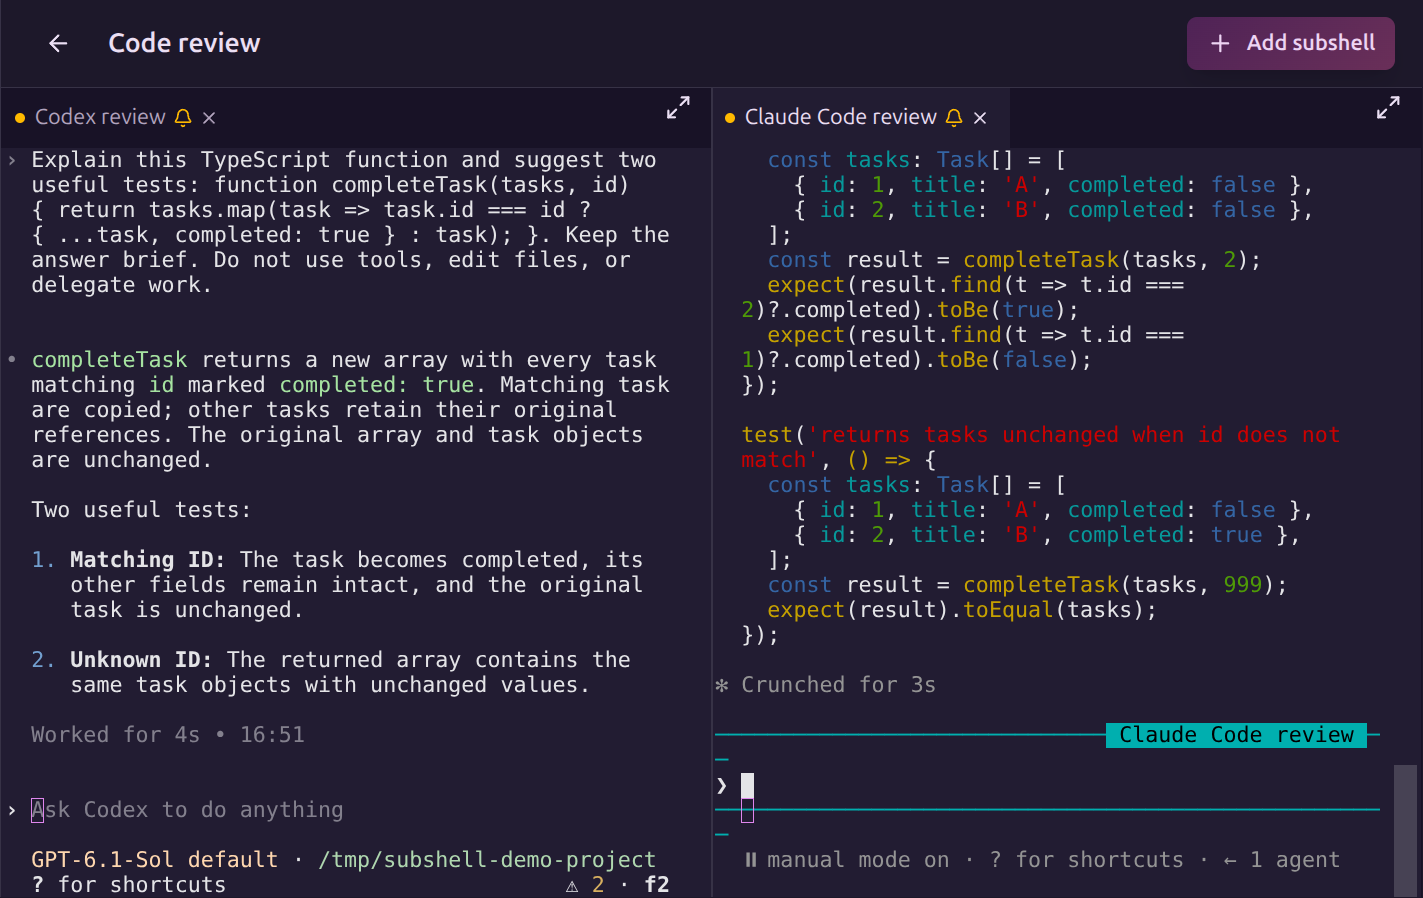
On a small screen, the workspace presents its panes as tabs instead of side-by-side terminals.
Drafts
Splitting a session can create a draft workspace. To keep an unsaved workspace, use the Save workspace icon beside its title and enter a name. Drafts appear separately from saved workspaces and can be discarded without creating a named workspace.
Removing a pane from a draft with fewer than two panes deletes that draft. A subshell can still exist independently after its workspace reference is removed.
Closing sessions
Closing a subshell permanently removes the session and its pane references from workspaces. Review Session lifecycle before confirming the action.
Changing a layout is different from changing a session's working directory or agent settings. Use Clone and switch presets for those launch operations.
Next steps
Use Presets to repeat launch settings and Share a subshell to grant session access.
Edit on GitHubLast updated on